Visar inlägg med etikett tamiya. Visa alla inlägg

fredag 12 februari 2016

Starting up my Horus Heresy alpha legion (Part II deliverance)

So as i mentioned in the previous post. I had tried a BUNCH of  different ways of doing the Forgeworld recipe but i only got half hatched solutions that were,simply put, not up to scratch at all. Even to my standards.

Alas a wise Raven came to me rescue....No. Not hugin or munin, but my actual mate that goes by the moniker.

He runs a sweet Tau army with a cool camouflage patterned set of crisis suits, now the mere idea of CAMOUFLAGE is so ridiculously usefull and utilitarian, that it had to be invented by the renegade farsight enclaves. Which is what he rolls, what does that entail? Him blasting me with melta and plasma from all angles generally.

But still, enough bellyaching about the state of 40K. More bellyaching about my painting.

So basically my mate went, "hey, wanna borrow my airbrush for a session and see what we get?" Little did i know that the first free taste is what gets you addicted......

Now he has a Harder steenbeck infinity airbrush, with a matching compressor. Now, at the time i had no idea, but this is a really.really. REALLY good airbrush, only as good as the use. of course. But good for beginners and excellent for experienced users in regards to the details you can get.

Now to AGAIN reiterate. This is the formula i went after


1. AIRBRUSH WITH THINNED LEAD BELCHER/ IRON BREAKER (50/50 MIX) 
2. AIRBRUSH FROM TOP OF MODEL WITH THINNED RUNFANG STEEL 
3. MIX A LITTLE TAMIYA CLEAR GREEN WITH TAMIYA CLEAR BLUE (25/75 MIX) AND AIRBRUSH OVER THE MODEL IN 2 COATS 
4. AIRBRUSH ARMOUR PANELS WITH TAMIYA CLEAR BLUE. BLENDING FROM MIDDLE OF FIGURE DOWN, SO THE STRONGEST BLUE COLOUR IS AT THE BOTTOM OF THE PANNELS 
5. AIRBRUSH FROM THE MIDDLE UPWARDS WITH TAMIYA CLEAR GREEN 
6. USING AN AIRBRUSH BLEND A HIGHLIGHT ON THE HIGHEST PANNELS (HEAD, SHOULDER PADS, TOP OF BACKPACK) WITH RUNEFANG STEEL WITH A TINY AMOUNT OF LOTHERN BLUE, EXTREMELY THINNED DOWN. 
7. APPLY THINNED COAT OF TAMIYA CLEAR BLUE OVER THE HIGHLIGHT AND BLEND INTO THE SURROUNDING AREA. 
8. USING A BLUE GLAZE, DRAG DOWN THE WHOLE MODEL ALLOWING IT TO SETTLE IN THE DEEPEST AREAS. 
9. SILVER – BASECOAT WITH LEADBELCHER 
10. WASH WITH NULN OIL 
11. HIGHLIGHT WITH LEADBELCHER IN STRIKING MOTIONS TO CREATED CHIPPED AND WEATHER APPEARANCE 
12. HIGHLIGHT WITH IRONBREAKER


I actually printed it out and had it laminated next to me. 
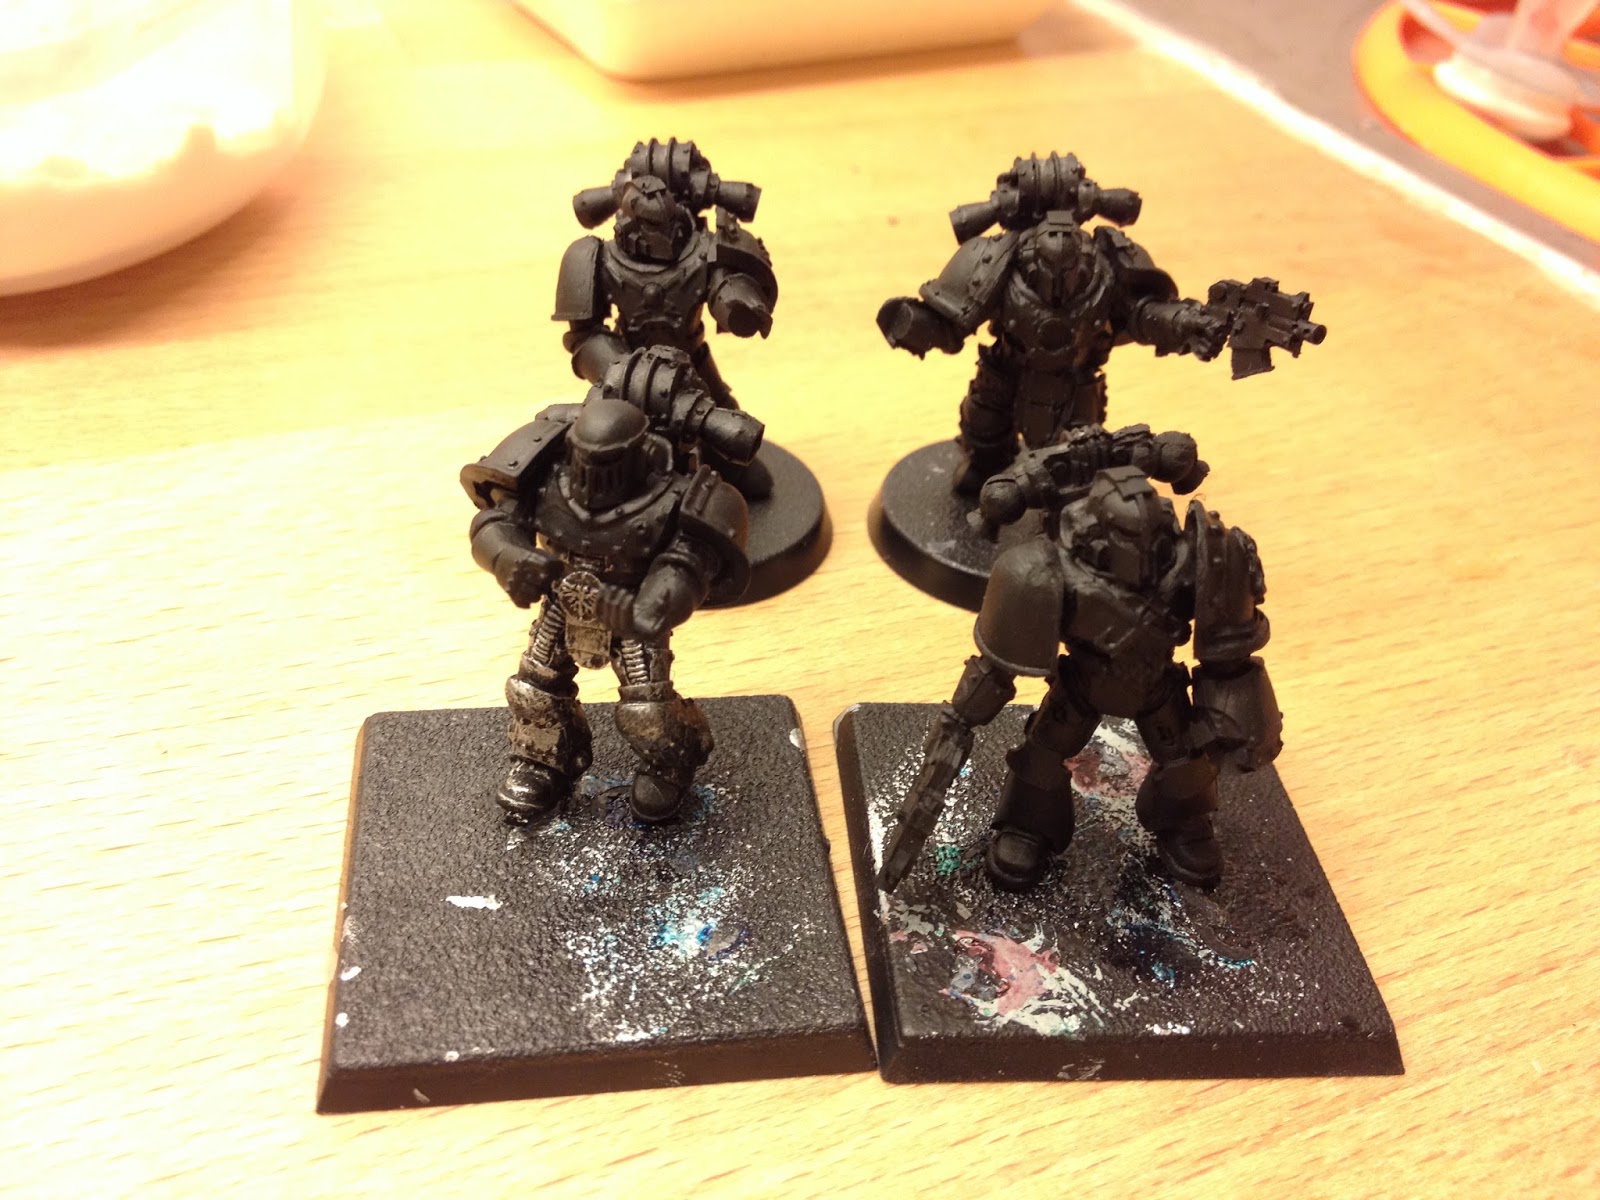
basing (step 0) 

So started by basing all the ones i was going do black, using Vallejo standard black primer. 

After this i ran into a snag, i had failed to notice that my one bottle of leadbelcher had dried out. Oh shit son! My friend, full of calm and wisdom suggested i move away a bit from being GW centric, and broaden my horizons...live a little.....

Falling for his husky tone and slender frame i quickly agreed. Where was the harm, really? 

Nowhere actually, i went with testing the Vallejo metallic range. And it was good. So good. 

sin in a bottle. Albeit a new sort of bottle for me. 

Step 1 


Having replaced the leadbelcher iron breaker step for a different selection colours ( thinned chainmail and metallic black) i moved on with priming approximately 30 Alpha legionairres, HQ's and two rapiers platsforms. 

Now, had i been more experienced i would have realized that this step alone would take more than an hour (my estimation) but still. lessons learned 'n all dat' zog 

Step 2 


moving on from the first step, i gave all models a slight shine of silver from overhead. To get a nice shine of depth. 

I was kidding with my friend that if i had done iron warriors i'd be half done now. Then i cried a bit in pitying myself. 

After being slapped into a semblance of normality,i moved on. 

Step 3 

So this is actually what the mix should look like in Step 3. 25% tamiya clear green 75% tamiya clear blue
After using my friends mixer bottles and thinner, i concocted the base mix of colours, and started doing models.

As is readily visible, after the first coat, you will have some transparency to the metall underbase. Which is why it is so important to be neither to silvery,nor to leadlike  
just plugging some despoilers here. 
Afte doing the first overpass you are going to want to let it dry off. Here is a good tip again. 

CLEAN YOUR AIRBRUSH INBETWEEN COATS. 

The alcohol based paint CAN and WILL deteriorate the metal, and rubber parts of the brush proper. So you will want to do a quick clean between each "drying phase" or not. It is up to anyone of greater experience to chose themselves. 


So the following pictures are after the second coat in step 3 


The second layer gives a nice depth, and really brings out all the details in the Alpha legion parts used on this model.

 This is actually one of the first models that i tried to do by brush. I simply sprayed it with a light step 1 and onwards.

bringing out the model on the left, as we will follow him on the rest of this little trip i am sketching out. 


And this is as far as i got for my 30+ modells in the seven or so hours that i i borrowed my friends airbrush, overall i was really glad to give it a swing. And the result finally lived up to my expectations.

But i was not nearly finished, was i? 


Starting up my Horus Heresy alpha legion army Part I (What not to do)

G'evening

so as the sun gently nestles 'neath the horizon i pour a large whiskey and start chronicling my humbling experience in painting the Alpha legion

So as i outlined in the previous post i had some....problems...with doing my horus heresy 30k Army. The gist of it is that i was totally enamored with Forge worlds own formula for doing the Alpha legion, yet a crucial part of the formula is to work with several thinned layers of Tamiya's own clear series.


Now for those of you that don't know, Tamiya basically does a high end of painting supplies and models, whose intended use is mainly for model cars, aircraft and high quality army miniature models. Their items can be summarized as High-end, in the sense that quality, materials, and items are all of the highest standards. But might run you on the pricier end of the cost spectrum.

Their Clear series is a line of alcohol based paints that,when properly thinned and used are great over metallic surfaces for a clear irridescent shine. I can also recommend using them over clear plastic (like cockpits) for your 40k models, as it gives a great tinting, as one would expect of say..Eldar aircrafts.


So the basic forgeworld recipee is, as i wrote earlier. As follows

1. AIRBRUSH WITH THINNED LEAD BELCHER/ IRON BREAKER (50/50 MIX) 
2. AIRBRUSH FROM TOP OF MODEL WITH THINNED RUNFANG STEEL 
3. MIX A LITTLE TAMIYA CLEAR GREEN WITH TAMIYA CLEAR BLUE (25/75 MIX) AND AIRBRUSH OVER THE MODEL IN 2 COATS 
4. AIRBRUSH ARMOUR PANELS WITH TAMIYA CLEAR BLUE. BLENDING FROM MIDDLE OF FIGURE DOWN, SO THE STRONGEST BLUE COLOUR IS AT THE BOTTOM OF THE PANNELS 
5. AIRBRUSH FROM THE MIDDLE UPWARDS WITH TAMIYA CLEAR GREEN 
6. USING AN AIRBRUSH BLEND A HIGHLIGHT ON THE HIGHEST PANNELS (HEAD, SHOULDER PADS, TOP OF BACKPACK) WITH RUNEFANG STEEL WITH A TINY AMOUNT OF LOTHERN BLUE, EXTREMELY THINNED DOWN. 
7. APPLY THINNED COAT OF TAMIYA CLEAR BLUE OVER THE HIGHLIGHT AND BLEND INTO THE SURROUNDING AREA. 
8. USING A BLUE GLAZE, DRAG DOWN THE WHOLE MODEL ALLOWING IT TO SETTLE IN THE DEEPEST AREAS. 
9. SILVER – BASECOAT WITH LEADBELCHER 
10. WASH WITH NULN OIL 
11. HIGHLIGHT WITH LEADBELCHER IN STRIKING MOTIONS TO CREATED CHIPPED AND WEATHER APPEARANCE 
12. HIGHLIGHT WITH IRONBREAKER

however as i lacked ready access to a airbrush i figured i would follow step 1-2 and then do the mix as outlined in step 3, and apply a thinner, and then cover the model in two light layers.

This garnered the following result 


Technical failings on other parts aside. The Problems is that you get a very "patchy" application. However, not to be deterred i attempted to use varying amounts of thinner. And experimented with adding more Tamiya green

The guy in front is the one with the "darkest" cover of Tamiya clear blue and green
Now, having just trial painted five different models. And finding that there was just no success to be had without an airbrush, i decided to try a different approach. However, there are two good points to learn from this sojourn.

I) Tamiya Clear green is a definite "Sub" paint. For those who haven't painted houses or the like this basically means that, when mixed with a paint of equal viscosity, it melds with the other component and adds a tint, but not a clear mix. 
this is important how? : Because it taught me the need of several separate layers of tamiya green when Airbrushing 
II) When doing a metallic layer, you simply cannot have a bright undercolor . you need a dark basecoat, and then added silver hightener to bring out the details.
Still not wholly deterred i attempted to redo the formula with a darker basecoat (more  leadbelcher less steel) . Which turned out like this. 


Huge honking fingerprint aside, it was getting better, but simply not what i imagined, nor what the FW scheme looked like. 


I scoured the interwebz and looked at different forums as how people had done Alpha legion, and i found one post on bolter and chainsword that advocated a sotek drybrush, followed by a darkblue wash. 

Now i had previously been bequeathed a bottle of the following from a mate 


Which i thought would fit the role qutie well. So i took a model i had done from spare parts and tried the following formula

I)basecoat abaddon black
II) prime with Vallejos green-blue
III) wash drakenhof nightshade
IV) edge highlight details with runefang silver

The result looked like this


Now this is a pretty rough draft of what it looked like, since i was pretty fed up by this point. So it looks a bit more polished today. I kinda digged the end result. It was nifty, and i made a point of remembering it. But it wasn't what i was into.

So i gave it one last shot.

Back to the Webz i went.

I found a third way, which involved alternating washes.

Basically


I)Abaddon black
II) base leadbelcher
III) highlight with runefang silver
IV) do a drakenhof nightshade
V) do a biel-tan shade
VI) alternate the two as desired. With an inclination of Drakenhof as the primary component
VII)Highlight with silver on "raised surfaces" and add more drakenhof

This resulted in this model


Which,again, while looking decent. Just didn't scratch the itch i had.

So by this point i had more or less given up, and longed for the sweet release of death. Or well, a bit less dramatically. For the sweet smell of airbrush.

Little did i know that salvation laid less than a hands reach away.........